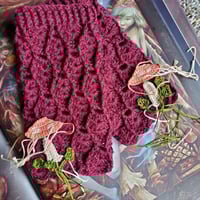
Back in January, I was steadily plugging away on the crochet pattern for my tablet case (which...
I’ve been crocheting for about 20 years now and one of the things I hear most often is, “Can you teach me?” (right up there with “What are you knitting,” and “Oooooooo make me one!”).
So, the answer is indeed, “Yes, yes I can!” (also, “I’m crocheting, it’s different than knitting,” and “Sure, I can make you anything, but it’ll cost ya!”).

Bringing you up to speed
The first thing to understand is crochet produces a fabric that is formed of interlocking loops of yarn. Thus, if you pull the working end of your yarn, the fabric will unravel. When conducted with intent, the unraveling is referred to as “frogging.” You’ll be doing this quite often as a beginner – the goal is to make loops that are the same size and tension, and beginners need to practice this. It IS harder than you think, so remember: When you ask for patience, you generally are rewarded with more opportunities to practice patience.
Next up, crochet is like everything else in life – everyone has their own way to do it and many hold the general belief that their way is the best way. I’ll tell ya, that’s total bs. Please, oh please, experiment with different ways of holding the hook, holding the yarn and anything else that makes you happy!
These things said, let’s start with a quick lesson of yarn and hook sizing. To be simple about it, there are different gauges of yarn, ranging from lace weight to super bulky, as well as hooks to accommodate these yarns.
The different weights are assigned a number – I just finished a scarf using lace weight yarn, which is a 1. Much of the yarn on racks in the grocery store is worsted weight, which is a 4. Hooks, in the U.S. size range, are labeled with a letter and number, so I used a B hook for my lace weight yarn. In metric, that is a 2.25 mm hook. For a worsted weight yarn, you could use a range of hooks from an I to a K.

Don’t worry, there’s no quiz on this - the yarn label will tell you the weight of the yarn and the recommended hook size for it. Also, whatever pattern you choose will tell you what weight of yarn to use as well as a recommended hook size to result in the project turning out as it was designed. A larger hook will make the project bigger, and a smaller hook will make the project smaller. This is why patterns also walk you through a test swatch, which tells you the number of rows and stitches as well as what size it should measure (yep, you’ll need a ruler or measuring tape). If it’s too large, try a smaller hook, or vice versa.
Did you get my note?
Okay, so you’ve got yarn and a hook. Your first official act is to make a circle with the end of the yarn and pull a loop of yarn through the circle. This, my friend, is a slipknot. Stick your hook right into the loop of yarn you pulled through to form the slipknot.
At this point, you should be holding the yarn in your left hand and your hook in your right (assuming you’re right-handed). Maneuver your hook under the yarn and catch it on the hook (referred to as “yarn over”), then pull that through the loop. Tah dah! That’s it. That all there is to it.
Just keep doing that until the loops don’t twist, come out roughly the same size and form a chain. No really, just practice that.
Also, I made you a lil video, since it’s sometimes easier to see it!
Eventually, the chain you produce will be a lovely stretch that you’ll build your projects off. For now, it’s likely a bit of a hot mess, but that’s to be expected. Keep going!